Dynamo Programming Process

Design Intent & Ideas
I made the stadium width to be controlled by dynamo. The width and height will be
dynamically controlled by sliders as against manually inputting numbers in the
parameters section. This will enable anyone adjust the size of the stadium to what they want. I have set limits to avoid geometric computational errors.
I executed the parametric design and modelling for the Allianz Arena to reflect the
original designer’s intents - i.e. display different light patterns at
different times depending on which football teams are playing (a program to change all the panels to the same colour or randomize additional swatches too). I also added a new twist to it by letting the stadium panels colours change position at random (i.e specific colour swatches randomly showing in different positions on defined panels).
Also I made the panel to respond to the time of the day, and adjusting the panel colours according to the surfaces most and least exposed to the sun's position. This will enable analysts determine the surfaces most impacted by heat or the panels receiving most sunlight.


Important Setup - Early Steps
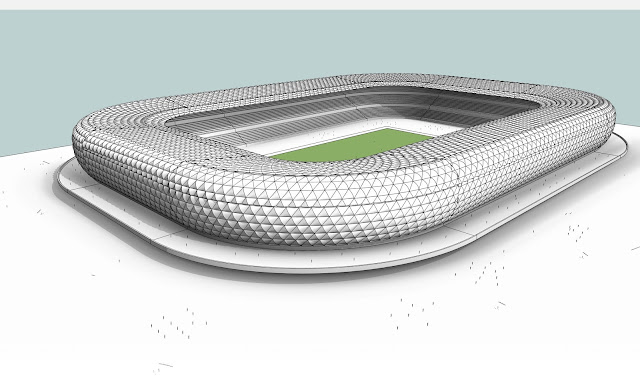
The first thing I did was to recreate the stadium profile, much smoother this time and optimized the bent surface to generate better panels. That way, I am able to manage my geometry and create smart dynamo programs (that don't execute for too long).
Step 1 - First Program
The first set of codes were created to adjust the stadium width and height based on already set parameters shown above and implemented in the programs in the images below. These codes are run and tested to make sure there are no geometry errors and speedy execution (very important).

Step 2 - Create Colored Panels
Creating the different types of panels based on their colours. I made different types of panel colours (and still retained the dark grey - named defaultpanel - so I can do several tests). I made only 4 new panel types and a default panel. P.S. You can edit as many colours as you want.


After loading the different types of panels into the project, I was able to select the divided surfaces and applied different types on them.
Step 3 - Create Static Panel Color Program
After successfully creating the previous step and loading it into the family, I created the dynamo program to adjust the color of the panels uniformly across board. You can change the colours based on their RGB values.


This will enable the user change the panels without having to edit the panel types.
Step 4 - Create Dynamic Panel Color Program
To further simulate a real scenario, i.e. different teams playing football and the stadium colour changing to their country flag colours etc, I created a program that will allow anyone input the colours based on the panel type. Thereafter, they can change different segments of the stadium to reflect same, and also, control random positions for the coloured panels using a randomizer dynamo node.

Step - select any of the segments and you can define what uniform colour panel type to make it.

Select the panel type and link it to the randomizer, adjust desired colour accordingly and run the program

Step 5 - More Dynamic Color Options
I further created more dynamo program to change the colours of the segments beyond just the preset types of the panels. This is also driven by the ColorByARGB Node.


Final Result of using Dynamo to change several features of the Stadium.
Step 6 - Changing Panel Heights
I also created a program to adjust the panel heights with a number slider. This will enable the user to not edit the panel each time. I created a limit to the maximum height the panels can go, so they don't appear our of proportion.

Step 7 - Panel Orientation to Sun Position

Tested the program with different times of the day and month. - December 21, 8:30am
I created a program to show the surface of the dome receiving the highest and lowest amount of sunlight per time. This will allow for further study of the panel behavior during different times of the year. This program is influenced by the sun settings from inside Revit. N.B. This program will not run if you are in a camera view.


Tested the program with different times of the day and month. - March 20, 12pm

Tested the program with different times of the day and month. - March 20, 5:15pm
Final Notes - Limitations
I discovered a few things during the creation of these codes.
The first thing I wanted to do was to put all the programs in a single file to run. However, I found out it was almost impossible (unless there is another way I have not tried). Therefore it is easy to create separate folders for some of the unique features you are trying to create. This way, it will be easy to manage your programs and outcomes.
Here is a screenshot of my folders. Each folder contains a Revit file or Revit family as the case may be, and its corresponding program.

Another limitation I experienced was, the Surface Normal at Parameter node did not execute when the panel used had a 'Revit Curve'. I had to make the panel component flat before the result could be processed. It will be good for future users to note this. It will save them a lot of time during creating similar projects.

Overall, it was a good experience creating this project.
Project Video
Below is the video of the project.
If you have comments or questions, please post them below.